Knowing whether or not your customers are satisfied, or whether or not you’re providing your audience with what they want and need, is an important part of running a successful business.
When you receive feedback or suggestions from your customers or audience it allows you to improve upon existing products, services, and offerings, and it also provides insights that could help you develop new products, services, and offerings.
But how do you go about getting that feedback or those suggestions?
How do you know whether or not your customers or your audience are getting what they want and need from you?
Great news is, it’s actually quite simple: you just have to ask them.
How to get real feedback from your audience
There are several online survey tools – both free and subscription-based – that allow you to create surveys and compile responses, including SurveyMonkey, SurveyGizmo, and Constant Contact.
But what if you want to put together a simple online survey in less than 5 minutes without having to sign up anywhere or provide any credit card information?
Google works hard to provide you with pretty much anything you could ever want or ask for (and more in my opinion). And one thing that’s been around for awhile is Google Drive, where you can create, share, and collaborate with a team on Word Documents, Excel Spreadsheets, Presentations and more.
One of my favorites: Google Forms.
Google Forms allow you to create an online survey in less than 5 minutes; share the link via email, on your website, or embed it; and receive feedback and responses via an online Excel Spreadsheet on your Google Drive.
Pretty cool, right?
I’ve got some more good news for you: Google Forms is free and super easy to set up!
How Google Forms work
1. Log into your Google account using Google Chrome Browser
You’ll know you’re logged in when you see your image in the upper righthand corner:
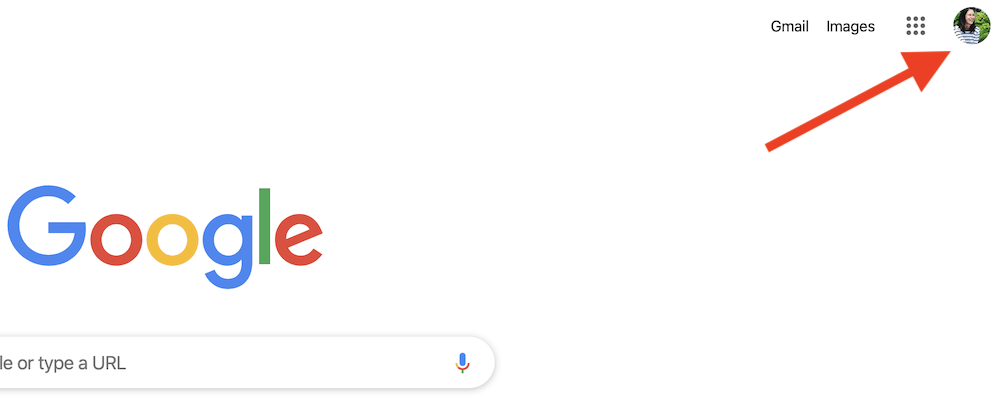
Once logged in, click on the set of square boxes just to the left of your picture, and select “Google Drive”.
2. Once on the Google Drive page, click on “New”
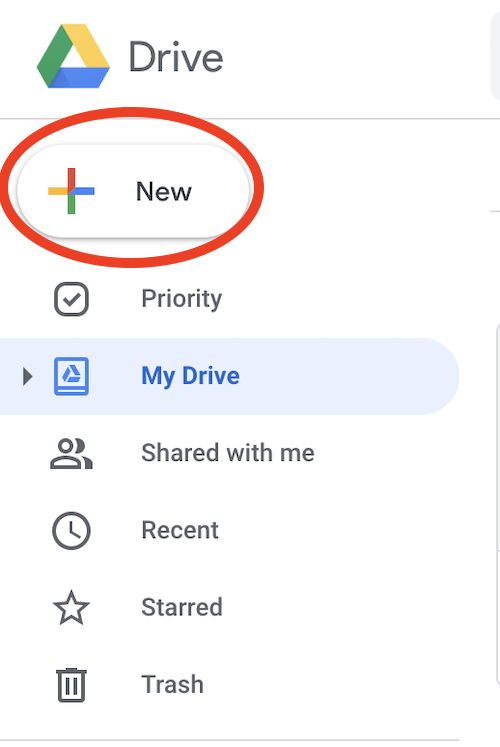
From the dropdown, select “More”, and then click on Google Forms:
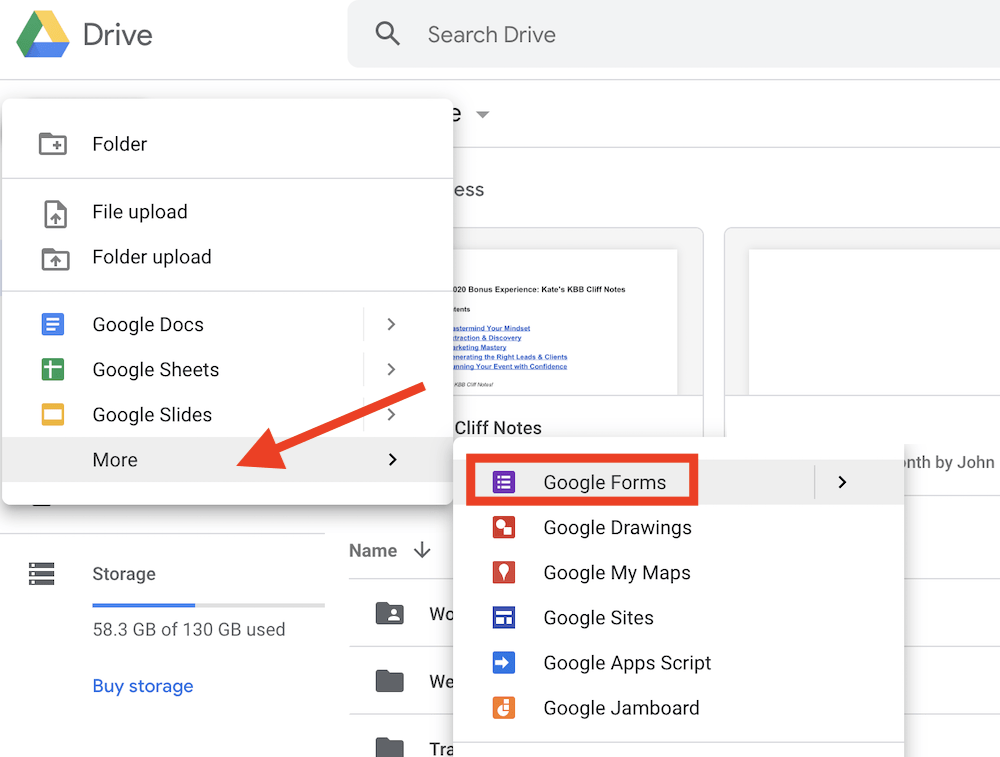
3. Once your Google Form opens, start by formatting your form
Start by giving your Google Form a name that describes what you’re using it for.
As an example, you might call it “Podcast Feedback”. You can name your form by clicking in the upper lefthand corner where it says “untitled form”.
In the upper righthand corner you have all of your settings (from left to right):
- Add-ons (like Form Notifications)
- Customize Theme (colors, images)
- Preview (to view your form)
- Settings (customized settings)
Spend some time reviewing these settings and deciding how you want your form to function.
The most important things to pay attention to here are under the Settings:
- General
- Presentation
- Quizzes
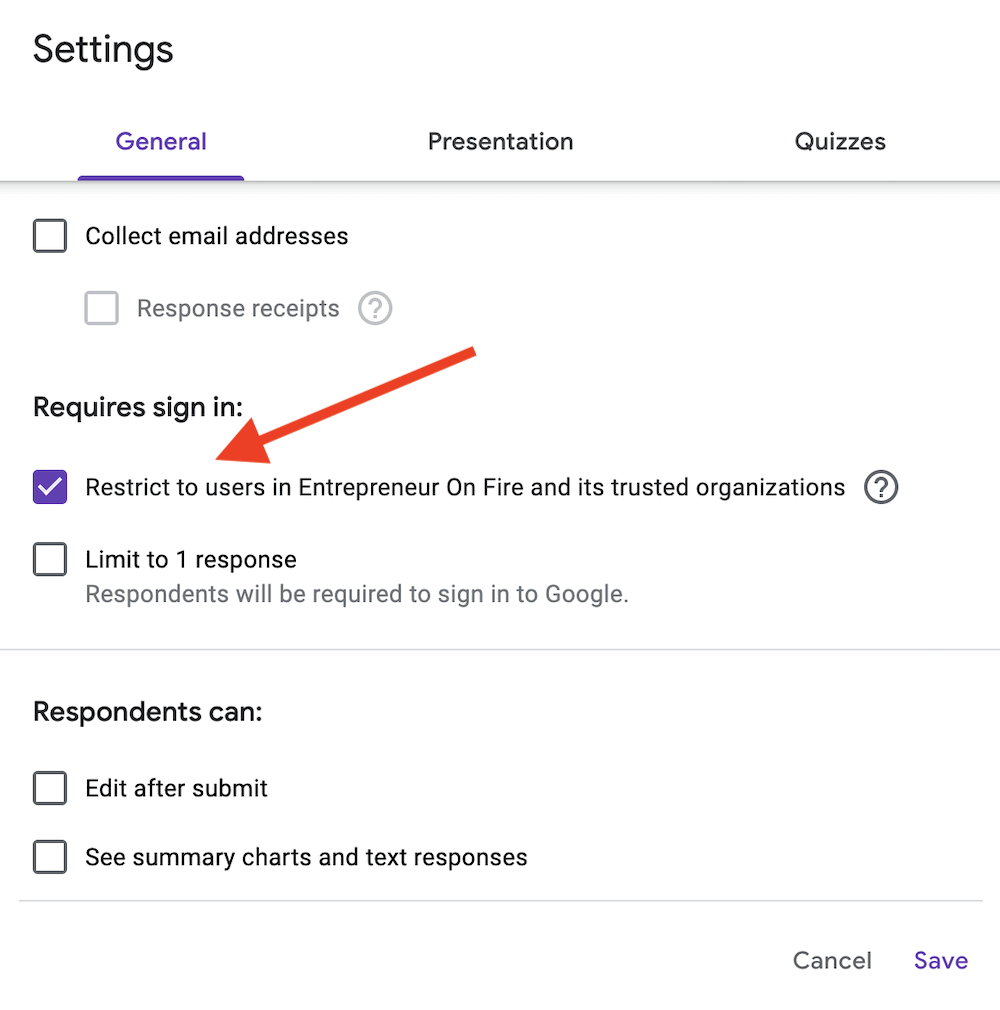
Under General, you’ll want to make sure you check the appropriate boxes based on your survey needs. For example, in the image below, no one outside of my organization would be able to fill out this Form (not the setting I want to have checked if I’m sending this out to my audience).
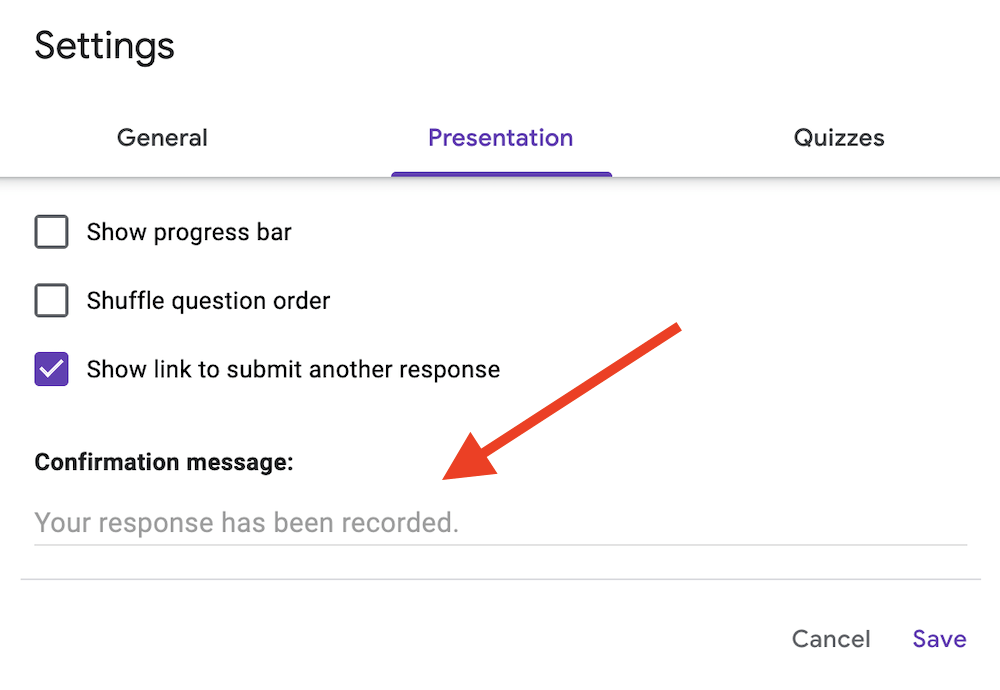
Under your Presentation settings, you’ll want to make sure you customized your confirmation message, and check any boxes that apply to how you want your Form to be shown to your users:
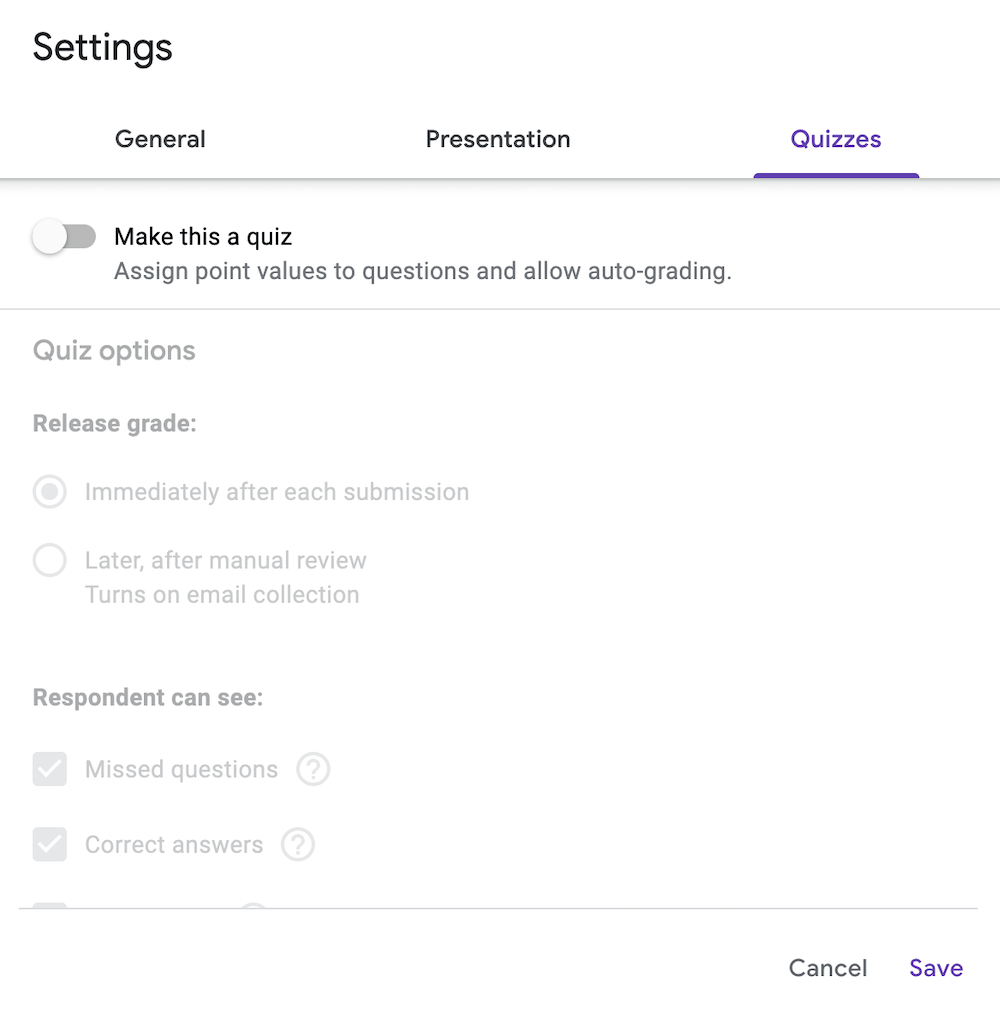
I haven’t personally used the Quizzes settings for anything up to this point; however, if you’re interested in creating a quiz with point values, this is the section where you’d set that criteria:
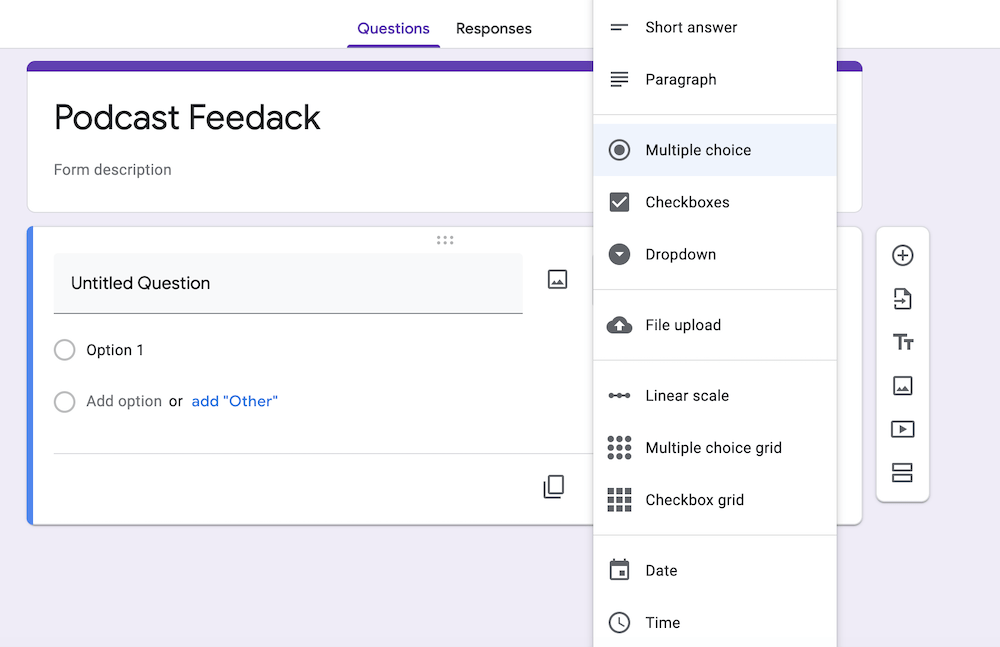
4. Add your first question by typing it in the “Untitled Question” box
When adding your questions, be sure to consider things like:
- Do I want to collect email addresses so I can follow up with those who submit the Form?
- Do I need any other geographical data to help inform my survey?
- Should I be adding in any description text to help my users better understand the question?
- Do I want all (or some) of my questions to be “required”?
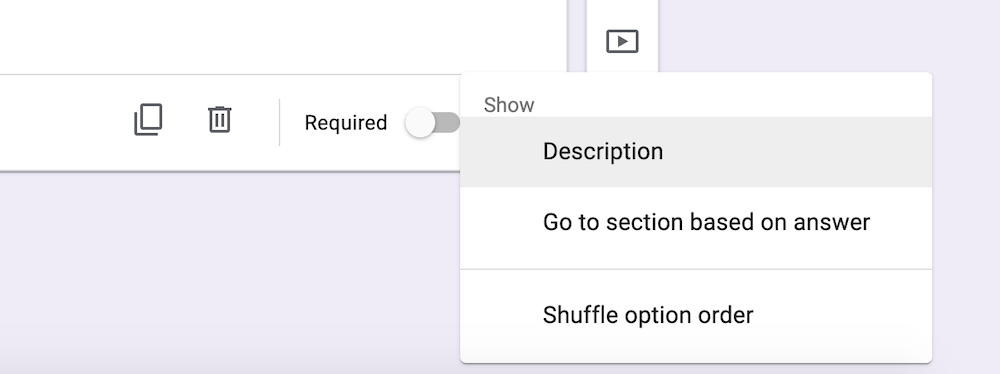
You can select different types of questions using the dropdown just to the right of the question box, and you can dictate wether the question is required or has a description using the settings below the question box:
5. Add multiple questions to your Google Form
You can add multiple questions to your form (recommended for best engagement and survey results) by clicking “Add Question” to the right of your form:
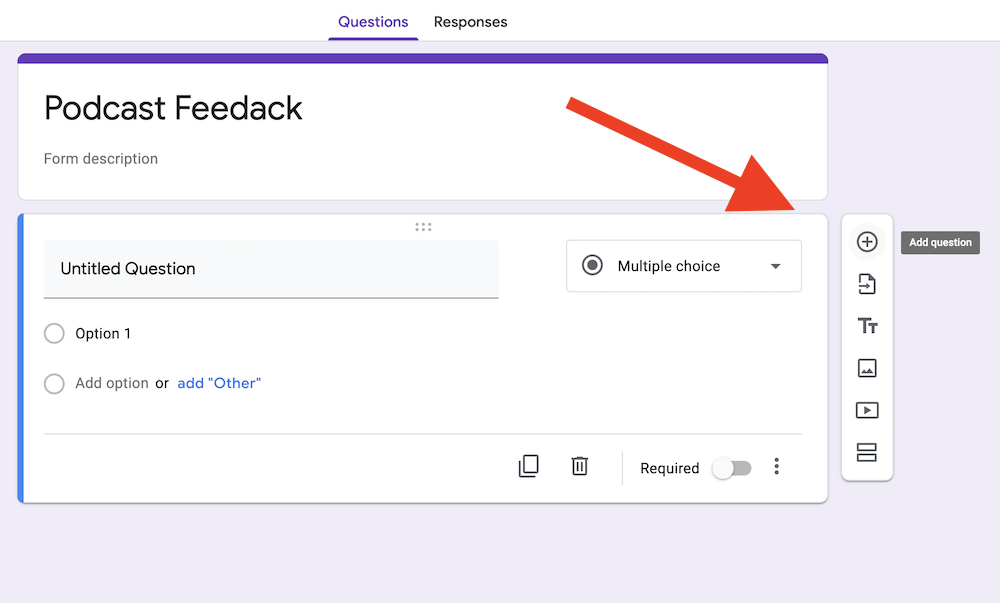
This is also where you can add images, videos, and change the text of your questions.
6. Select your Form sharing options (add collaborators)
Once you’ve finished entering all of your questions, be sure you have the sharing options set if you want to have collaborators on your Form.
You can do this by clicking on the 3 dots in the upper righthand corner (next to your overall Form settings), and then selecting Add Collaborators:
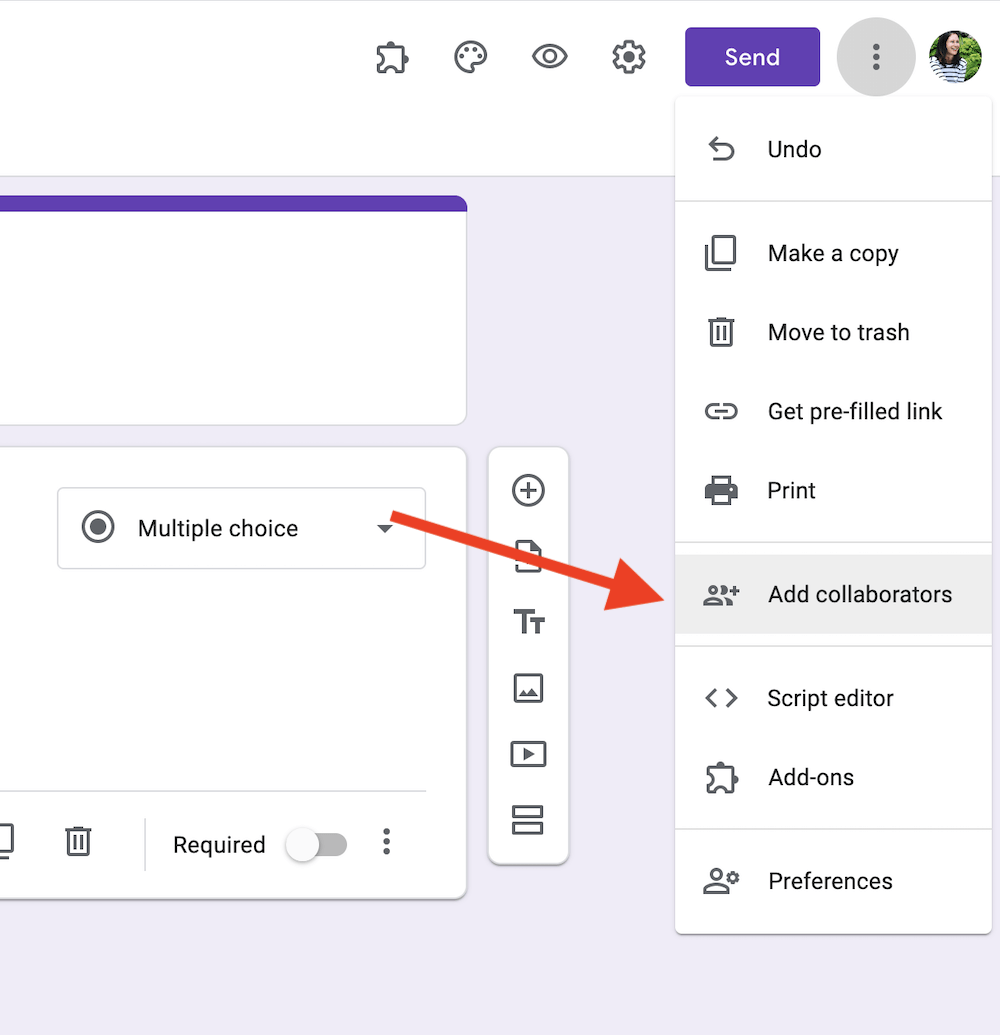
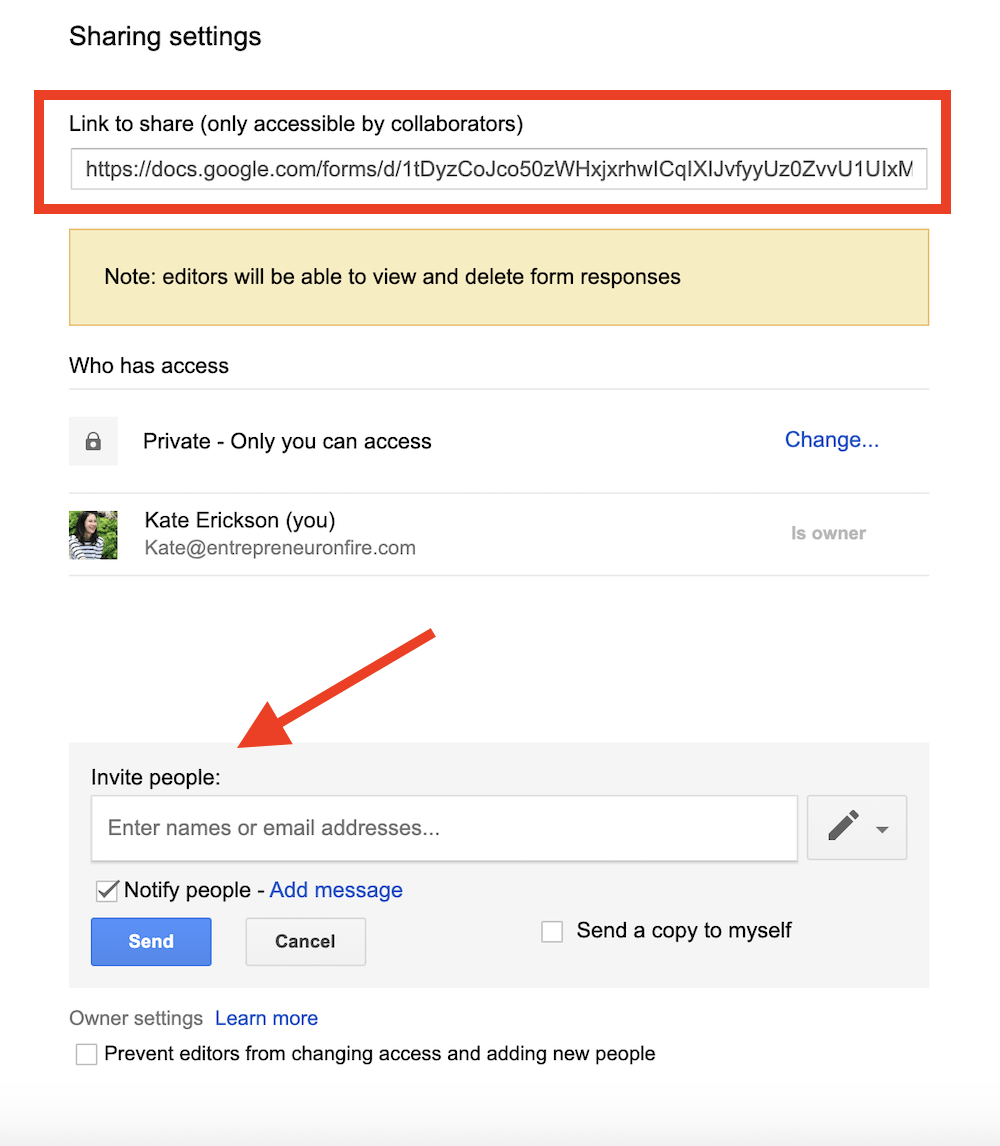
Once the sharing options open, you can choose to share the link with collaborators or send them a message directly letting them know you’re sharing your Form with them.
Note: if you choose to share the link with collaborators, be sure you click on the “Change…” link to allow others access to your Form:
7. Preview and share your Google Form!
Now it’s time to preview and share your Google Form with your intended audience!
It’s always important to double check your Form settings and appearance, so be sure to “Preview” your Google Form (using the eye icon in the upper righthand corner) and test it out before sharing it with the public.
Once approved by you, click on the “send” box in the upper righthand corner and choose how you will share your Form:
- Email it automatically to contacts
- Link to it manually in an email, blog post, or on social media
- Embed it on your website
8. Review responses
As you continue to promote your Form and receive feedback, make sure you’re checking it regularly!
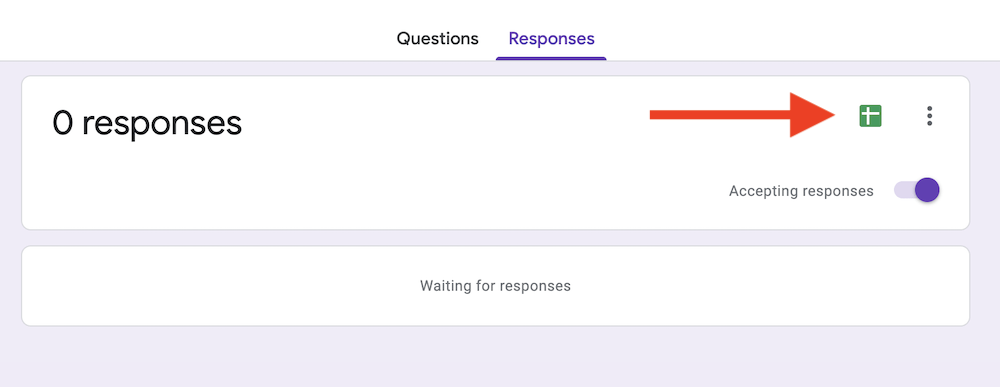
You can view a summary of your responses straight from your Google Form, or you can also choose to have a Google Spreadsheet created with your responses:
Feedback, customer service, and more
See how simple creating your own survey via Google Forms can be?
Aside from obtaining priceless feedback or suggestions from your customers and your audience on your existing products, services, and offerings, you’re also doing what every business should take great pride in: providing good customer service.
Letting your customers know that you not only care enough to ask for their feedback and suggestions, but that you also plan on actually doing something with the information they provide is huge.
In addition, you’re finding out valuable information about their pain points, which you can then take and create products, services, and offerings that can help.
It’s also a great strategy to take the feedback and suggestions you receive from your online survey and show your customers or audience that you’ve made improvements or solved the problems they’ve identified.
As an example, maybe your audience told you they’d find great value in being able to access your podcast via a standalone mobile app. Then you might add a simple widget on your home page that says “You asked, we responded! Access our new mobile app here.”
If you’ve been looking for an easy way to create a quick online survey to ask for feedback or suggestions from your customers or audience, then I hope this post was helpful!
Want more? Check out our post on how to increase engagement to serve your audience!